How to Set Up a Freebie Funnel in Kajabi: The 5 Essential Steps (Plus One Secret Step!)
Nov 06, 2026You created a freebie that you know your ideal clients will love. Maybe it's a checklist, a guide, a workbook, a mini-training, or something else that gives your audience a helpful starting point and quick win.
Now, how do you get it into the hands of the people who want it?
You need a freebie funnel!
And not just a landing page with a form where someone enters their email address. You want a funnel that works behind the scenes, automatically delivering your freebie, welcoming new subscribers, and helping you build relationships with the people who may eventually become paying clients.
You want a system that does the heavy lifting for you.
A well-built freebie funnel gives you a way to consistently grow your email list, nurture your audience, and make offers to people who are interested in what you do. It's an important piece of building a business that runs smoothly and supports your goals - without requiring you to be involved in every little task.
And if you're someone who loves creating content but doesn't particularly love figuring out the tech behind it, you're in the right place! Helping coaches and course creators get these systems set up inside Kajabi is exactly what I do.
But where do you start? And what actually needs to be set up inside Kajabi to make everything work together?
In this post, I'm walking you through the five essential parts of a Kajabi freebie funnel, plus one final (and very important!) step that you don't want to skip.
This is the same framework I use when building freebie funnels for my clients, and understanding how these pieces fit together can help you create a smoother experience for both you and your new subscribers.
Ready? Let's get into it!
The 5-Part Kajabi Freebie Funnel Framework
When I build a freebie funnel for a client, I follow a specific order to make sure all the pieces are created and connected properly.
This isn't just about making things look pretty inside Kajabi. It's about creating a complete subscriber experience, from the moment someone discovers your resource to the moment they receive it and begin getting to know you.
There are five essential parts:
- The form
- The landing page
- The thank you page
- The email sequence
- The automations
And then there's one final step: Testing everything!
Each piece has a specific job to do. When they're all connected correctly, your lead magnet funnel can run in the background while you focus on serving your clients and growing your business.
Let's look at each one!
1. The Form: Collect Your New Subscriber's Information
Your form is the piece that actually collects the information from someone who wants your free resource. They enter their details, click submit, and become a new contact in your Kajabi account.
At a minimum, you'll typically want to collect their name and email address. You can also decide whether there are any additional details (e.g. phone number, address, social handles) you'd like to ask for, depending on your business and how you plan to use that information. As a rule, I recommend that you ask for only what you really need. The more details you require, the more likely that your potential subscriber will leave the page without actually signing up.
But there's another important decision to make here:
What happens immediately after someone submits your form?
Will they get a basic success message? Do you want them to see a thank you page (this is what I recommend)? Should they be redirected somewhere specific? How will they know their information was successfully submitted?
These are details worth thinking through before you start building.
Why does the form come first?
Because your form does more than collect contact information. It's also the starting point for your automated workflow.
When someone submits it, Kajabi can use that action to trigger the next steps in your funnel. For example, it can add a tag to their contact record and subscribe them to the appropriate email sequence.
We'll talk more about those automations in Step 5.
2. The Landing Page: Give People a Reason to Subscribe
Your landing page is an invitation. It's where people learn about your lead magnet, decide whether it's something they want, and choose whether they're going to hand over their email address to get it.
And remember, this may be one of the first impressions you're making on a future subscriber.
You want to make it count!
Think about the words you're using:
- What is your freebie helping them do?
- Why would your ideal client want it?
- What problem does it help them solve?
- What will they walk away with after using it?
Notice, that these questions are all about them. They’re not about you or the features of the resource itself (although you can include a little bit about those things to). They’re answering the question, “What’s in it for me?”
Your landing page should make the value of your freebie clear. Your visitor should be able to quickly understand what they're getting and why it's worth signing up.
Make the next step obvious and easy.
This is not the place to give people 15 different things to click on.
You don't need to send them to your podcast, invite them to follow you on Instagram, ask them to join your Facebook group, and promote your paid offer all on the same page.
Those things may have their place elsewhere in your marketing, but your landing page has one main job: Get people to subscribe.
The fewer distractions, the easier it is for someone to take that next step.
A few other details to remember when creating your landing page:
- Add a clear headline that grabs their attention and speaks to the result or benefit of your freebie
- Explain what they'll get when they sign up
- Include your opt-in form so visitors can subscribe right there
- Make sure the page looks good on both desktop and mobile
- Set up your SEO title and meta description so your page has the information it needs to be searchable
And here's one reason we created the form first: You'll need to add that form to your landing page!
Think of it as putting together a puzzle. When you build the pieces in the right order, they fit together much more easily.
When I work with clients, I take care of building their landing page inside Kajabi, too. That includes bringing their branding into the design, making sure the content is organized clearly, adding the opt-in form, and taking care of those little details like the SEO title and meta description.
The goal is a page that looks and feels like your brand while making it easy for visitors to sign up.
3. The Thank You Page: Welcome Them Into Your World
Someone just signed up for your freebie. Yay!
Now what?
This is where your thank you page comes in.
And I want you to think of this page as more than a simple confirmation that someone submitted a form.
It's their first little welcome into your world.
Think about the feeling you want to create. Do you want them to feel excited? Appreciated? Reassured that they just made a great decision?
Your thank you page is an opportunity to reinforce that feeling.
But there's something even more important: Don't leave your new subscriber wondering what happens next.
Have you ever clicked a button online, submitted a form, and then been left staring at the screen wondering if anything actually happened?
Did it go through? Did I do something wrong? Should I click again?
It's not a great feeling!
Your thank you page should eliminate that uncertainty.
Make sure you clearly explain:
- That their request was successful
- How they'll receive their freebie
- Whether they need to confirm their email address
- Whether they should check their inbox or spam folder
- How they can get help if they have trouble accessing their resource
You might choose to make the freebie available directly on the thank you page, deliver it through email, or do both.
There's no single right answer. The important thing is that your subscriber knows exactly what to do next.
And while you're here, consider giving them one more way to connect with you.
Maybe you'd like to invite them to follow you on Instagram or join your free community. This is a great place to make that invitation!
Just keep it simple. One clear next step is plenty.
I would also hold off on trying to sell something right away. Your new subscriber just met you. Give them a chance to get their freebie and start building a relationship with you first.
When I set this up for clients, I help them think through the entire experience, not just what the page looks like. We make sure the messaging is clear, subscribers know where to find their freebie, and they have a helpful next step.
It's a small page, but it plays an important role in making the funnel feel complete.
4. The Email Sequence: Start Building the Relationship
Now we're getting to one of the most important parts of your freebie funnel: Your emails!
Think about what happens when you join a new group or start a new job.
You usually don't get dropped right into the middle of everything with no explanation. There's some kind of onboarding or orientation to help you understand where you are, what's happening, and what you need to know.
Your email nurture sequence is a mini-onboarding experience for your audience.
When I think about onboarding, there are three main goals:
- Welcome the new person
- Get the information you need to serve them
- Give them the information they need to get what they want out of the experience
Your welcome sequence does exactly that.
First, you deliver the free resource to your new subscriber.
When someone signs up for your freebie, they've trusted you with their email address in exchange for something you promised. Making sure they receive that resource promptly is one of the first opportunities you have to build trust.
It's a small detail, but it matters!
Second, send them a welcome or nurture sequence that introduces them to you, your business, and the value you provide.
There are plenty of different email templates and sequence outlines out there, but I think your welcome sequence should accomplish five main things.
- Welcome your new subscriber.
Yes, this sounds obvious, but don't skip it!
Let them know you're happy they're here. A little warmth and personality can go a long way in making someone feel welcome.
- Introduce yourself.
Who are you? Who do you help? What do you believe? And why should they stick around?
This is your opportunity to give them a little more context about the person behind the freebie.
- Learn something about them.
Your email list isn't just a place to broadcast information. It's a place to build relationships.
Ask a question. Invite them to hit reply. Find out what they're working toward or what challenges they're facing.
The more you understand your audience, the better you can serve them.
- Share more value.
Your freebie doesn't have to be the only helpful thing they receive from you.
You could share another free resource, link to one of your most popular blog posts, recommend a podcast episode or YouTube video, or simply offer a few additional tips related to their goals.
Give them another reason to enjoy hearing from you!
- Let them know what to expect moving forward.
How often do you send emails? What kinds of things do you typically share? Will they hear about new resources, helpful tips, upcoming events, or offers?
Give them a little preview of what being on your email list looks like.
This can also be a natural place to introduce your paid offer and let them know how you can help them take the next step when they're ready.
I also help my clients get their delivery and welcome emails set up inside Kajabi. Depending on what they already have prepared, this might mean adding their existing email copy, formatting the emails to match their brand, setting up the sequence, and making sure everything is ready to go.
You bring the message; I take care of getting it into Kajabi and connected to your funnel.
5. Automate It: Connect All the Pieces
We've made it to the final building step!
This is where everything comes together and your freebie funnel starts doing its job automatically.
Remember that form we created in Step 1?
Now we want to make sure that when someone submits it, they're automatically tagged and added to the correct email sequence.
No manual work required!
There are two primary automations you'll want to set up.
Automation #1: Tag your subscribers
Tags are a way to organize your contacts inside Kajabi.
When someone signs up for your lead magnet, you can automatically apply a tag that identifies which resource brought them to your list.
For example, if you have a free checklist, you might apply a tag like "Freebie - Checklist."
If you also have a free training, you could use a different tag for those subscribers.
Why does this matter?
Because as your business grows and you create more freebies, you'll want to know where your subscribers are coming from.
This information can be helpful when reviewing your analytics, understanding what your audience is interested in, and planning future follow-up campaigns.
It also makes it easier to organize your contacts and create more relevant experiences for different segments of your audience.
Automation #2: Connect your form to your email sequence
Once their tag is added, your new contact will receive your delivery email, followed by your nurture sequence on the schedule that you decide.
You may also want to include an automation that removes someone from the nurture sequence once they've completed it.
This can be particularly important if you're excluding new subscribers from certain launch emails, sales campaigns, or other marketing sequences while they're receiving their initial welcome emails.
The goal is to make sure the right things happen at the right time without you having to manage each action individually.
This is where your freebie funnel becomes a connected system instead of a collection of separate Kajabi pages and emails.
All five pieces work together to create a seamless experience for your new subscribers.
And this is one of the areas where I do a lot of behind-the-scenes work for my clients. I set up the necessary tags, connect the form to the appropriate email sequence, and configure the automations so the right actions happen when someone subscribes.
But I'm not finished just because the automations are in place. There's one more important step!
6. The Secret Step: Test Everything!
Here's the step that can make the difference between a funnel that only looks finished and one that's actually ready to do its job.
Test everything!
I know, I know. Testing isn't the most exciting part of building a funnel. You'd probably rather admire your beautiful new landing page and move on to the next project.
But a funnel isn't finished just because the pages look good.
You need to know that everything works the way it's supposed to.
And the best way to do that? Run through the entire subscriber experience yourself.
Start at the beginning.
Visit your landing page as if you're someone who just discovered your freebie. Fill out the form using a test email address and submit it.
Then follow the journey:
- Does the form submit successfully?
- Are you redirected to the correct thank you page?
- Does the thank you page clearly explain what happens next?
- Are all of the links and buttons on your page working properly?
- Is the correct tag applied to your contact record?
- Does the delivery email arrive?
- Does the email contain the correct link or attachment?
- Are you added to the correct email sequence?
- Are the remaining emails scheduled and triggered as expected?
- Do any other automations fire when they shouldn't?
And here's one more thing: Don't forget to check your mobile views!
A lot of people will discover your freebie while browsing on their phones. Your landing page, thank you page, and emails should all be easy to read and use on a smaller screen.
Check your buttons, images, spacing, text, and links. Make sure nothing looks awkward or gets cut off.
When I build freebie funnels for clients, testing is an important part of my done-for-you setup. Because the goal isn't just to hand over a collection of finished Kajabi pages.
It's to hand over a working funnel that's built, branded, automated, tested, and ready for traffic.
Trust me, you'll be glad you took the time to do this!
What Happens When You Build Your Freebie Funnel Without a Plan?
You might be thinking, "Okay, I can see why I need all these pieces. But how complicated can it really be?"
Well, here's the thing.
Kajabi gives you lots of tools to work with, but knowing where everything lives and how the pieces connect can take some time to figure out.
And if you jump straight into building without a plan, it's easy to find yourself bouncing back and forth between different areas of your account.
You start creating your landing page, realize you need a form, switch over to create that, then remember you need a thank you page. Next, you're working on your emails, but you haven't figured out how they're going to connect to the form.
Before you know it, you've got 15 tabs open, a half-finished funnel, and no idea which pieces you've already completed.
Even worse, when things aren't connected correctly, your funnel can break.
Maybe someone submits the form but never receives the delivery email. Maybe the wrong email sequence gets triggered. Maybe subscribers aren't being tagged properly, making it harder to organize your list later.
And if someone signs up for something you promised, only to have a confusing or frustrating experience, it can damage the trust you're trying to build.
This is something I see when clients come to me for help. They often have a good idea of what they want their funnel to do, and they may even have some of the pieces created already.
What they need is someone who understands how all those pieces fit together and can take care of the technical setup.
Now imagine approaching the setup with a clear framework.
You know what needs to be created, why each piece matters, and how everything connects. You work through the setup in a logical order instead of constantly jumping between tasks.
The result?
A smoother setup process for you and a clearer, more professional experience for your subscribers.
They sign up, receive confirmation, get their promised resource, and start hearing from you in a thoughtful welcome sequence.
You deliver what you said you would, when you said you would.
And behind the scenes, your system is doing the work without you needing to check on every new subscriber.
That's the kind of experience you want to create!
Do I Really Need All Five Pieces? Can't I Just Have a Landing Page and a Delivery Email?
This is a fair question!
And if you're trying to keep things simple, you might be wondering whether you really need all these different pieces just to give someone a free download.
The short answer? You can certainly start with a simple setup.
But each piece serves a purpose.
Your landing page gets people interested in your freebie. Your form collects their information. Your thank you page confirms that their request went through and tells them what happens next. Your email sequence delivers the freebie and begins building the relationship. And your automations connect everything so those actions happen without you having to manage them manually.
Think of it this way: You don't need to make your freebie funnel complicated, but you do want to make sure the important pieces are covered.
You can absolutely keep your pages simple, your emails conversational, and your automations straightforward.
The goal isn't to build the biggest or fanciest funnel possible.
It's to create an experience that works well for your subscribers and supports your business.
And if you're not sure how to put all those pieces together inside Kajabi, that's something I can help with!
You Don't Have to Build Your Freebie Funnel All By Yourself
Here's something I want you to remember: Understanding how a freebie funnel works and actually building one inside Kajabi are two different things.
You can have a great freebie, know exactly what you want your landing page to say, and have your email sequence ready to go.
But that doesn't necessarily mean you want to spend hours figuring out Kajabi forms, page settings, automations, tags, and email sequences.
And you don't have to!
If you're a coach or course creator who's creating something new, your time is valuable. You probably have plenty of other things to work on, from creating your content to supporting your clients and planning your next offer.
The technical setup doesn't have to be another project that takes over your to-do list.
That's where done-for-you Kajabi support comes in.
When I build a freebie funnel for a client, I take care of the behind-the-scenes setup so they can focus on what they do best.
I take the framework we've talked about in this post and put all the pieces together inside your Kajabi account.
That means you don't have to figure out how to connect everything, wonder whether your emails are triggering correctly, or spend hours troubleshooting a funnel that isn't working the way you expected.
You get a complete system designed to support your business and help you add new email subscribers more consistently.
And as your business grows, having these foundational systems in place makes it easier to create new resources, nurture your audience, and make offers without starting from scratch every time.
Before You Log Into Kajabi, Start Here!
Here's a little secret: The first step to building your freebie funnel actually happens before you even log into Kajabi.
I know, I know. It's tempting to jump straight into your account and start creating pages!
But taking a little time to prepare can make the entire setup process so much smoother.
Before you start building, you'll want to:
- Map out the journey you want your new subscriber to take
- Decide what information you'll collect on your form
- Gather your freebie and any other images or branding assets you'll need
- Prepare your landing page content
- Decide what your thank you page should communicate
- Outline your delivery email and welcome sequence
- Think through what automations you'll need
Having everything organized and ready before you begin can save you a lot of time and help you avoid the back-and-forth that often happens when you're trying to build as you go.
And I've created a free tool to help you do exactly that!
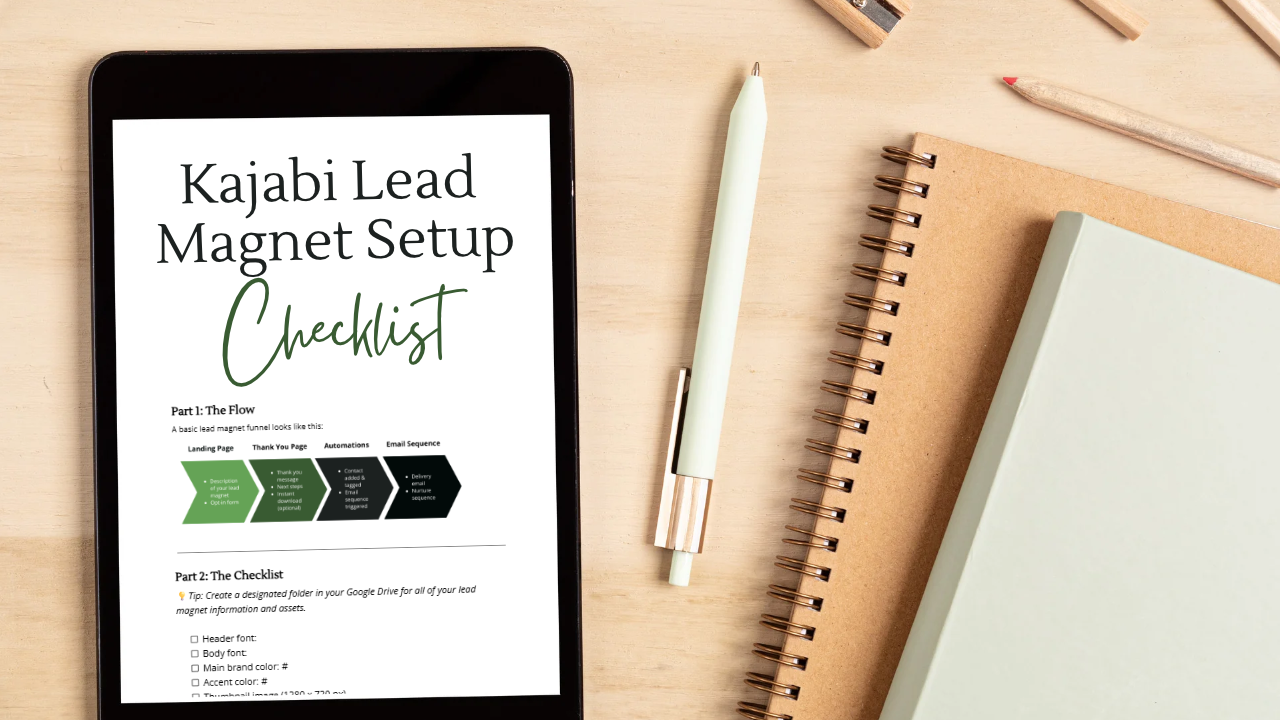
Grab your copy of the Kajabi Lead Magnet Setup Checklist.
It's a helpful resource for getting your ducks in a row before you start building, so you can approach your freebie funnel setup with a clear plan.
GET THE KAJABI LEAD MAGNET SETUP CHECKLIST HERE.
And if you'd rather skip the technical setup altogether and have someone else take care of it for you, I'd love to help.
My done-for-you Kajabi freebie funnel setup takes care of the building, branding, automations, and testing so your funnel is ready for traffic and ready to start welcoming new subscribers.
You create the freebie. I'll take care of the tech that gets it into the hands of the people who need it.
Because growing your business shouldn't mean spending all your time building the systems behind it!